
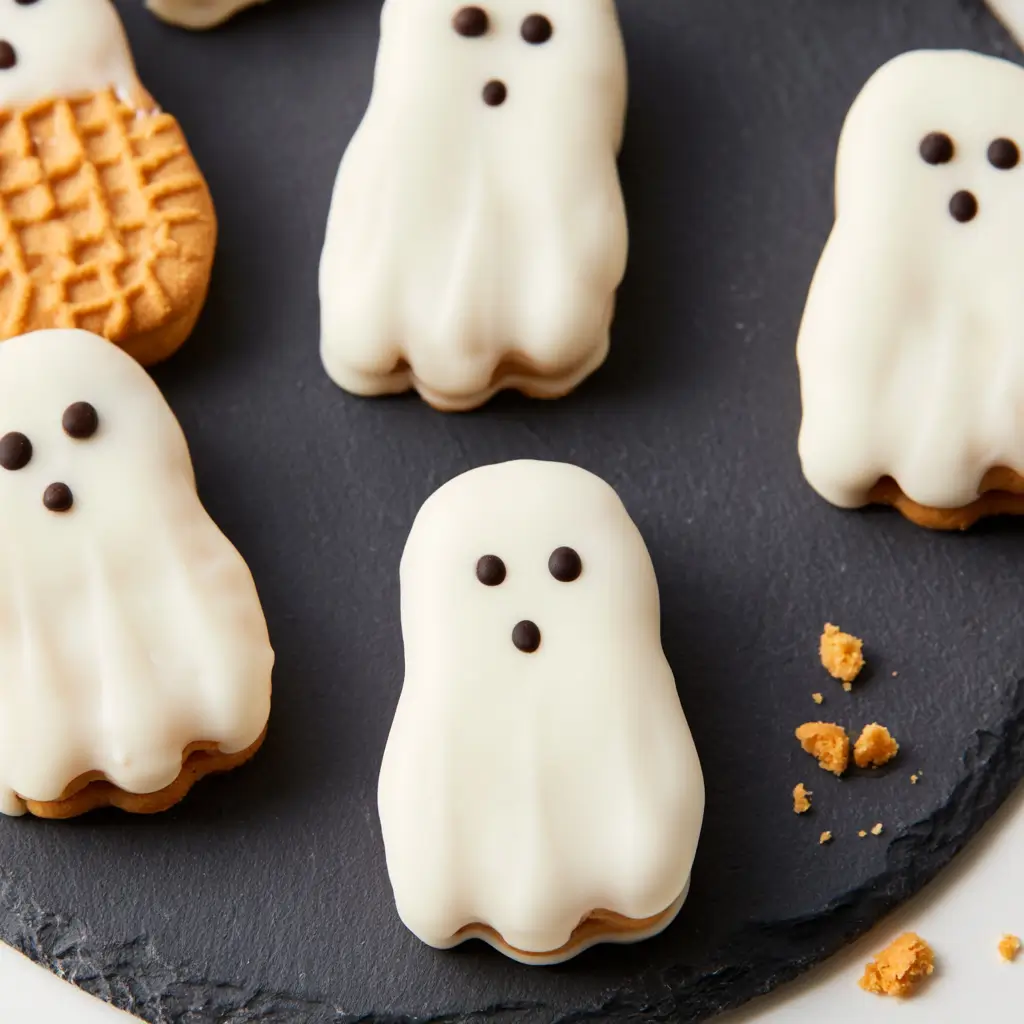
These spooky little cookies are the kind of treat that makes Halloween feel instantly festive. They are sweet, playful, and simple enough to make with kids or for a last-minute party tray.
Spooky Ghost Cookies
Equipment
- 1 Microwave-safe Bowl
- 1 Parchment Paper
Ingredients
- 24 peanut butter cookies baked and cooled
- 1 cup white chocolate or white candy melts melted
- 0.25 cup mini chocolate chips for eyes and mouths
- neutral oil optional, to thin coating if needed
Instructions
- Prepare the peanut butter cookies according to your recipe or package directions. Let them cool completely before decorating, because warm cookies will melt the coating.
- Melt the white chocolate or candy melts in a microwave-safe bowl, stirring often until smooth. If needed, add a small spoonful of neutral oil to thin it slightly.
- Dip or spoon the melted coating over each cooled cookie, letting it drip naturally so the bottom edge looks ghost-like. Place the cookies on parchment paper.
- Before the coating sets, press on mini chocolate chips for eyes and a tiny mouth. You can make each ghost look a little different for extra charm.
- Allow the cookies to rest at room temperature until the coating is firm. If you are in a hurry, chill them briefly until set.
Notes
Why You’ll Love This Spooky Ghost Cookies
These cookies are adorable, no-fuss, and perfect for sharing. The peanut butter cookie base gives them a soft, rich bite, while the simple ghost decoration makes them look charming without needing special decorating skills.
Spooky Ghost Cookies Ingredients & Substitutions
Here is what you will need to make these cookies, plus a few easy swaps if needed.
- Peanut butter cookies, use your favorite homemade dough or store-bought dough
- White chocolate or white candy melts, for the ghost coating
- Mini chocolate chips, for the eyes and mouth
- Alcohol-free vanilla extract, for a little extra flavor if making homemade dough
- Butter, if your cookie dough needs fat for structure
- All-purpose flour, for thickening homemade dough if needed
If you need a nut-free option, use a sunflower seed butter cookie base instead of peanut butter. For the ghost coating, white candy melts usually set more neatly than white chocolate, but either one works.
Step-by-Step Instructions to Make Spooky Ghost Cookies
Step 1: Bake the cookies
Prepare the peanut butter cookies according to your recipe or package directions. Let them cool completely before decorating, because warm cookies will melt the coating.
Step 2: Melt the coating
Melt the white chocolate or candy melts in a microwave-safe bowl, stirring often until smooth. If needed, add a small spoonful of neutral oil to thin it slightly.
Step 3: Shape the ghosts
Dip or spoon the melted coating over each cooled cookie, letting it drip naturally so the bottom edge looks ghost-like. Place the cookies on parchment paper.
Step 4: Add the faces
Before the coating sets, press on mini chocolate chips for eyes and a tiny mouth. You can make each ghost look a little different for extra charm.
Step 5: Let them set
Allow the cookies to rest at room temperature until the coating is firm. If you are in a hurry, chill them briefly until set.
Tips for Success
Make sure the cookies are fully cooled before decorating, or the white coating may slide off. Work with only a few cookies at a time so the topping stays soft enough for the chocolate chip face. If the coating gets too thick, warm it very gently and stir well.
Variations of Spooky Ghost Cookies
You can use sugar cookies, chocolate cookies, or even shortbread as the base instead of peanut butter cookies. For a different look, add tiny candy eyes or pipe the faces with melted dark chocolate. You can also sprinkle the tops with white sanding sugar before the coating sets for a little sparkle.
Serving Suggestions: What to Pair with Spooky Ghost Cookies
These cookies are lovely with a cold glass of milk, hot chocolate, or warm apple cider. They also make a sweet ending to a Halloween dinner spread alongside fruit, popcorn, or other festive treats.
Storage & Reheating Instructions
Store the decorated cookies in an airtight container at room temperature for up to 3 days, or in the refrigerator for up to 5 days. Place parchment between layers to keep the faces from smudging. These cookies do not need reheating, but if chilled, let them sit out for a few minutes before serving.
Memories Made Around the Table
There is something special about recipes that feel playful enough to make everyone smile. These little ghost cookies are the kind of treat that invites conversation, a few laughs, and maybe even a decorating contest at the kitchen table.
FAQs
Can I make these cookies ahead of time?
Yes, you can bake the cookies a day or two in advance and decorate them later. Once decorated, they keep well for several days in an airtight container.
What is the best coating for the ghosts?
White candy melts are the easiest option because they set smoothly and hold their shape well. White chocolate also works if you want a richer flavor.
Can I use a different cookie base?
Absolutely. Sugar cookies, chocolate cookies, or shortbread all make a fun base for the ghost topping.
How do I keep the chocolate chips in place?
Press them into the coating while it is still soft. If the coating starts to set, dab on a tiny bit more melted chocolate to act like glue.
Final Thoughts
Spooky Ghost Cookies are a fun, easy way to bring a little Halloween magic to your kitchen. They are simple to make, cute to serve, and always a hit with both kids and adults.