
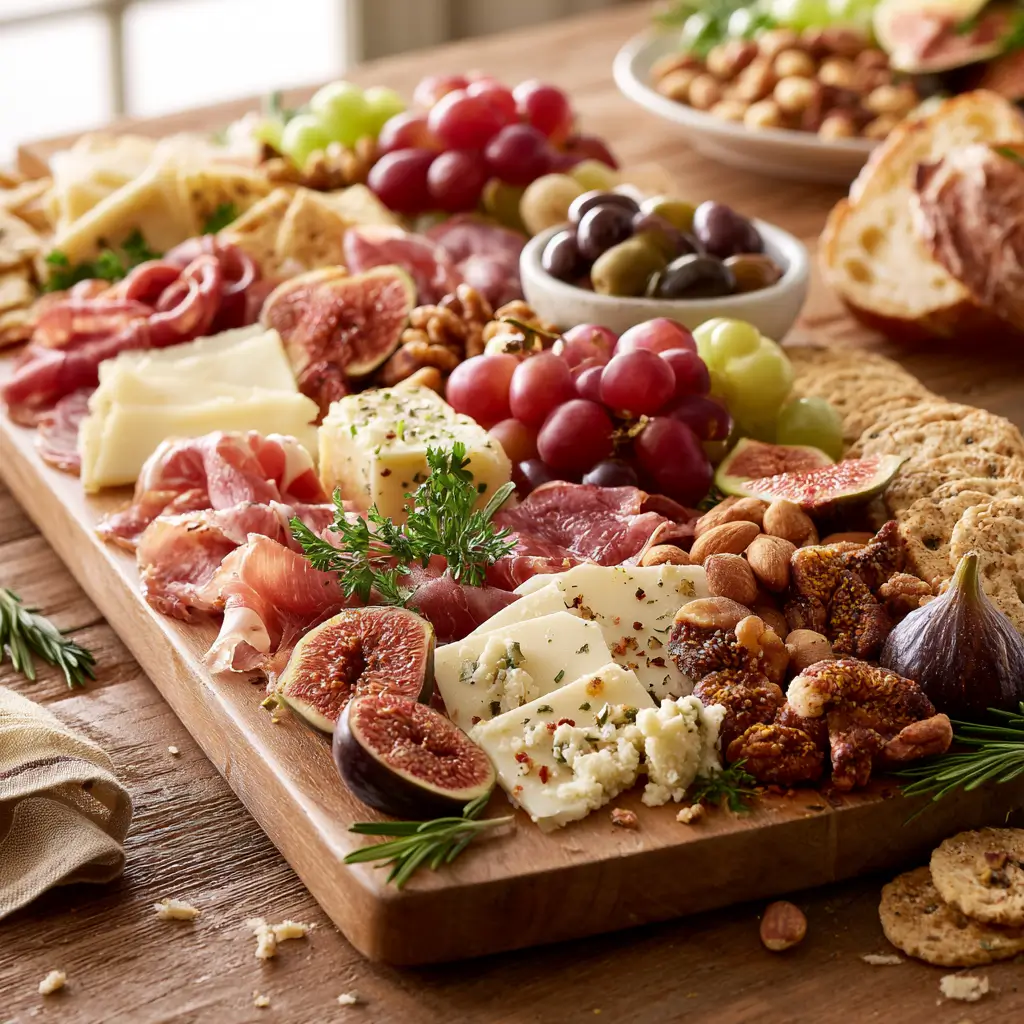
These rustic charcuterie board ideas make a cozy dinner party feel effortless, welcoming, and a little special. With a mix of cheeses, fruit, nuts, and savory bites, you can build a beautiful board that looks impressive without much fuss.
Rustic Charcuterie Board Ideas
Equipment
- 1 Wooden board or large platter
- 1 Small bowls for honey, preserves, or olives
Ingredients
- Assorted cheeses like sharp cheddar, gouda, brie, or manchego
- Crackers or sliced baguette
- Fresh fruit like grapes, figs, apple slices, or berries
- Olives or pickles
- Roasted nuts such as almonds or walnuts
- Honey or fruit preserves
- Fresh herbs like rosemary or thyme
- Turkey slices or turkey salami optional
- Dark chocolate squares or dried fruit
Instructions
- Start with a wooden board, serving tray, or large platter. A rustic surface helps the ingredients look warm and inviting.
- Place the cheeses first, spacing them out across the board. Add small bowls for honey, preserves, olives, or other loose ingredients so everything stays tidy.
- Fan crackers and bread around the cheese. Then tuck fruit, nuts, and meat slices into the open spaces to create color and balance.
- Use the smaller items, like herbs, berries, or dried fruit, to fill any empty spots. This is what makes the board feel abundant and finished.
- Bring the board to the table just before guests arrive so the crackers stay crisp and the fruit looks fresh.
Notes
Why You’ll Love This This Dish
This board is easy to customize, so you can use what you already have and still end up with something lovely. It also invites grazing, which makes it perfect for relaxed gatherings where everyone can snack, chat, and help themselves.
This Dish Ingredients & Substitutions
Here is a simple mix of ingredients to create a balanced board:
- Assorted cheeses, like sharp cheddar, gouda, brie, or manchego
- Crackers or sliced baguette
- Fresh fruit, like grapes, figs, apple slices, or berries
- Olives or pickles for a briny bite
- Roasted nuts, such as almonds or walnuts
- Honey or fruit preserves
- Fresh herbs, like rosemary or thyme, for a rustic look
- Turkey slices or turkey salami, if you want a meat option
- Dark chocolate squares or dried fruit for a sweet finish
Substitutions are simple. Swap one cheese for another based on your budget, use gluten-free crackers if needed, or add extra fruit if you want a lighter board. If you prefer more savory flavors, include hummus, roasted vegetables, or seasoned chickpeas.
Step-by-Step Instructions to Make This Dish
Step 1: Choose your board
Start with a wooden board, serving tray, or large platter. A rustic surface helps the ingredients look warm and inviting.
Step 2: Add the anchor items
Place the cheeses first, spacing them out across the board. Add small bowls for honey, preserves, olives, or other loose ingredients so everything stays tidy.
Step 3: Build around the centers
Fan crackers and bread around the cheese. Then tuck fruit, nuts, and meat slices into the open spaces to create color and balance.
Step 4: Fill the gaps
Use the smaller items, like herbs, berries, or dried fruit, to fill any empty spots. This is what makes the board feel abundant and finished.
Step 5: Serve right away
Bring the board to the table just before guests arrive so the crackers stay crisp and the fruit looks fresh.
Tips for Success
Mix textures so every bite feels interesting, creamy cheese, crunchy crackers, juicy fruit, and something salty. Keep the color palette varied, because reds, greens, golds, and creamy tones make the board look naturally beautiful.
If you are serving a larger group, make two smaller boards instead of one crowded one. It is easier to refill and looks more inviting.
Variations of This Dish
You can give the board a seasonal twist by leaning into what is fresh. In fall, use pears, grapes, and apple butter. In winter, add dried apricots, spiced nuts, and clementines.
For a more substantial spread, add hummus, marinated artichokes, stuffed peppers, or roasted sweet potatoes. You can also build around one flavor theme, like creamy cheeses and fruit, or bold cheeses and pickled vegetables.
Serving Suggestions: What to Pair with This Dish
This board pairs well with a simple green salad, a warm soup, or a hearty pasta dish for a full dinner party menu. For drinks, try sparkling water with citrus, apple cider, or a nonalcoholic punch.
If you want to round out the table, add a loaf of crusty bread and a bowl of herbed olive oil for dipping. That extra touch makes the whole spread feel thoughtful.
Storage & Reheating Instructions
Store leftover cheeses, meats, fruit, and dips in separate airtight containers in the refrigerator. Crackers and bread should be kept in a dry container at room temperature so they stay crisp.
There is no reheating needed for the board itself. If you serve bread or nuts warm, refresh them briefly in the oven before setting them out again.
Memories Made Around the Table
Some of my favorite dinner party moments happen around a board like this, when everyone leans in, points out their favorite bite, and keeps reaching for just one more cracker. It has a casual charm that makes people settle in and stay awhile.
FAQs
How far in advance can I make a charcuterie board?
You can prep most of the ingredients a few hours ahead, then assemble the board shortly before serving. This keeps the fruit fresh and the crackers from softening.
What cheeses work best for a rustic board?
Choose a mix of textures and flavors, like one soft cheese, one firm cheese, and one bold cheese. That gives guests more variety without making the board complicated.
How do I make the board look full?
Start with larger items first, then fill the spaces with smaller ingredients like nuts, berries, herbs, and dried fruit. A full-looking board is really about layering and thoughtful placement.
Can I make this board vegetarian?
Yes, just skip the meat and add more cheese, vegetables, dips, olives, and fruit. It will still feel generous and balanced.
Final Thoughts
Rustic charcuterie board ideas are all about ease, color, and comfort. With a few simple ingredients and a little arranging, you can create a cozy dinner party centerpiece that feels inviting every time.