
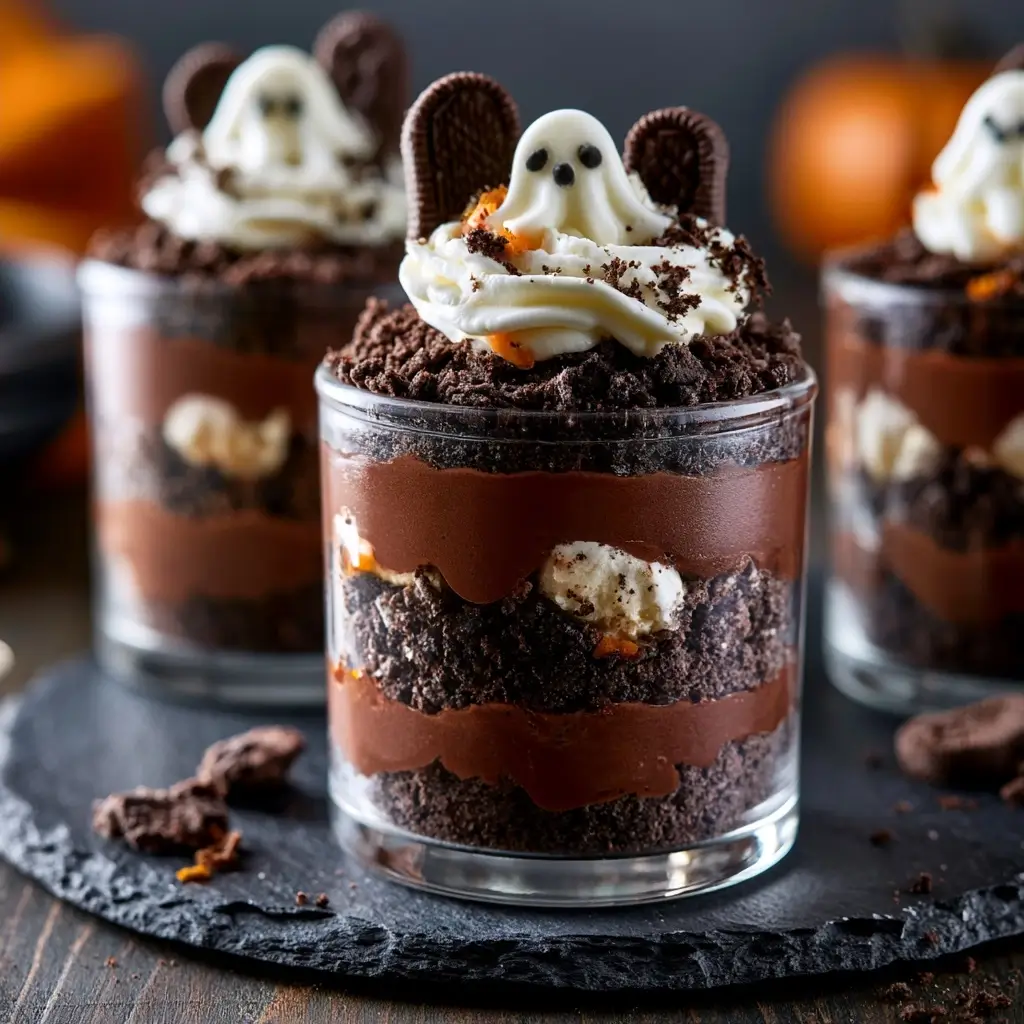
These Halloween Dirt Cups are a playful spooky dessert that always gets a big smile at the table. With creamy chocolate pudding, crushed cookies, and fun graveyard decorations, they are easy to assemble and perfect for parties.

Halloween Dirt Cups
Equipment
- 1 Mixing Bowl
- 1 Whisk
- 1 Serving cups clear cups preferred
- 1 Bag for crushing cookies
Instructions
- Prepare the chocolate pudding according to the package directions, or whisk up your homemade version. Let it thicken before assembling.
- Place the cookies in a bag and crush them into fine crumbs. You want a soft dirt-like texture that still has a little crunch.
- Spoon a layer of pudding into serving cups, then add a layer of cookie crumbs. Repeat until the cups are filled.
- Top each cup with more cookie crumbs, gummy worms, and a cookie tombstone. If you like, pipe a word like RIP onto the tombstones with frosting or melted chocolate.
- Refrigerate until ready to serve so the cups stay cool and the layers set nicely.
Notes
Why You’ll Love This Halloween Dirt Cups Recipe
This treat is simple, no-fuss, and fun to make with kids. It uses familiar ingredients, comes together fast, and looks festive without needing any special baking skills.
Halloween Dirt Cups Recipe Ingredients & Substitutions
- Chocolate pudding mix, or use homemade chocolate pudding
- Milk, any dairy or unsweetened plant milk you like
- Chocolate sandwich cookies, crushed into fine crumbs
- Whipped topping, or lightly sweetened whipped cream
- Gummy worms
- Chocolate cookie sticks or small rectangular cookies for tombstones
- Chocolate frosting or melted chocolate for writing on the tombstones
If you want a richer flavor, try stirring a little cocoa powder into the pudding. For a lighter version, use less whipped topping and more pudding.
Step-by-Step Instructions to Make Halloween Dirt Cups Recipe
Step 1: Make the pudding
Prepare the chocolate pudding according to the package directions, or whisk up your homemade version. Let it thicken before assembling.
Step 2: Crush the cookies
Place the cookies in a bag and crush them into fine crumbs. You want a soft dirt-like texture that still has a little crunch.
Step 3: Layer the cups
Spoon a layer of pudding into serving cups, then add a layer of cookie crumbs. Repeat until the cups are filled.
Step 4: Add the spooky toppings
Top each cup with more cookie crumbs, gummy worms, and a cookie tombstone. If you like, pipe a word like RIP onto the tombstones with frosting or melted chocolate.
Step 5: Chill and serve
Refrigerate until ready to serve so the cups stay cool and the layers set nicely.
Tips for Success
Use clear cups to show off the layers, they make the dessert extra festive. Keep the cookie crumbs fairly fine so they look like real dirt, and chill the cups before serving for the best texture.
Variations of Halloween Dirt Cups Recipe
Try using vanilla pudding with extra cocoa cookie crumbs for a cookies and cream style version. You can also add candy pumpkins, mini chocolate chips, or crushed pretzels for a little salty crunch.
Serving Suggestions: What to Pair with Halloween Dirt Cups Recipe
These cups are great after a cozy fall dinner or served alongside other party sweets. They pair nicely with apple cider, fruit skewers, or a simple platter of cookies.
Storage & Reheating Instructions
Store the assembled cups covered in the refrigerator for up to 2 days. For the best look, add the gummy worms and tombstone cookies close to serving time so they stay fresh and tidy. This dessert does not need reheating.
Memories Made Around the Table
There is something so nostalgic about digging into a cup of chocolate pudding and cookie crumbs. It brings a playful, homemade feel to Halloween gatherings and always seems to become the dessert everyone remembers.
FAQs
Can I make these Halloween Dirt Cups ahead of time?
Yes, you can assemble them a day in advance and keep them chilled until serving. For the neatest presentation, add the final toppings just before guests arrive.
Can I use homemade pudding instead of a mix?
Absolutely. Homemade chocolate pudding works beautifully and gives the cups a richer, more from-scratch flavor.
What cookies work best for the dirt layer?
Chocolate sandwich cookies are the classic choice because they crush into dark, sandy crumbs. Any crisp chocolate cookie will work well.
How do I keep the crumbs from getting soggy?
Assemble close to serving time if possible, and keep the cups cold until you are ready to enjoy them. A thicker pudding layer also helps the crumbs hold their texture longer.
Final Thoughts
Halloween Dirt Cups are one of those easy desserts that bring big fun with very little effort. They are festive, kid-friendly, and just spooky enough to make dessert time feel special.