
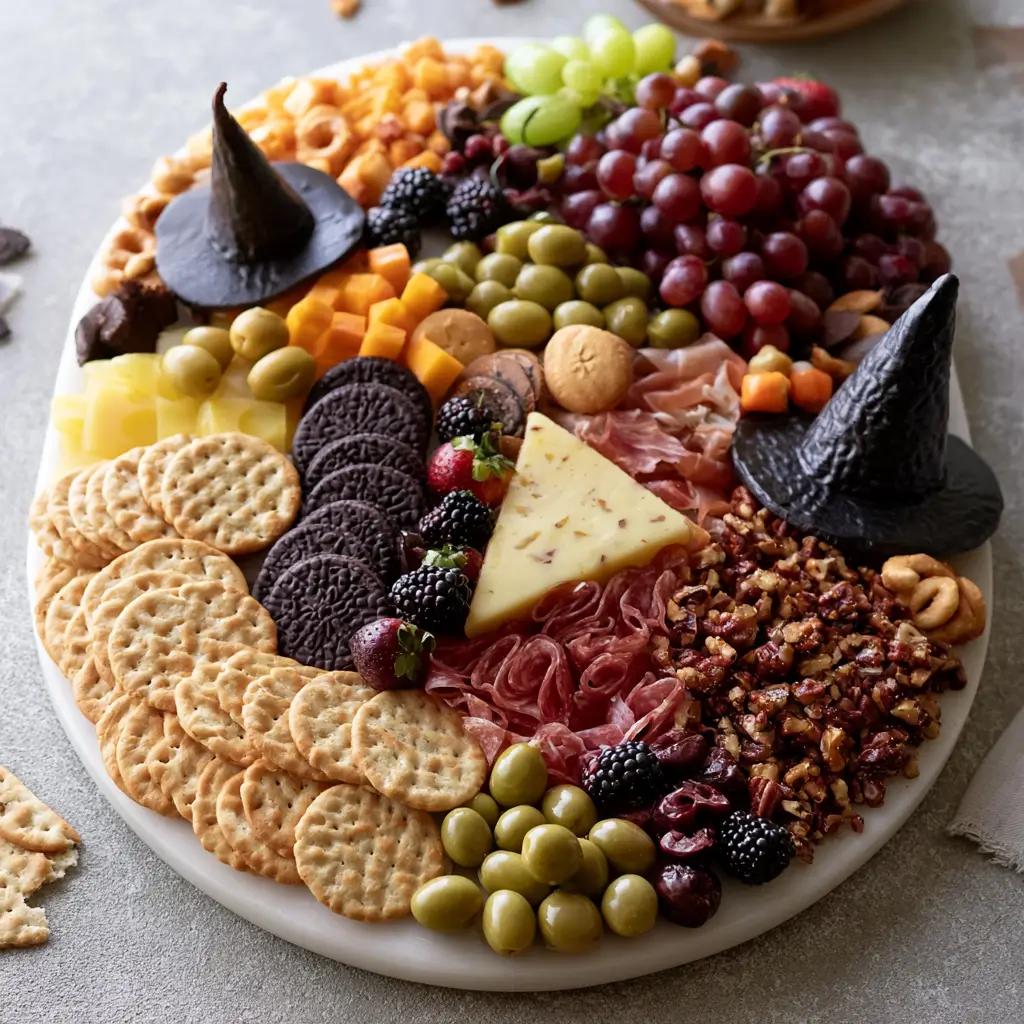
There is something so fun about putting together a Halloween cheese board for a spooky get-together. This festive platter looks impressive on the table, but it is really just a mix of good cheese, fruit, crackers, and a few playful touches.

Halloween Cheese Board
Equipment
- 1 Large wooden board, tray, or platter
- 1 Small bowls optional
Ingredients
Cheeses
- Assorted cheeses such as cheddar, gouda, brie, or mozzarella
Crunchy items
- Crackers breadsticks, or sliced baguette
Fruit
- Fresh fruit such as grapes, strawberries, apple slices, or blackberries
Savory add-ins
- Olives
- Nuts such as almonds or cashews
- Turkey pepperoni or turkey salami if desired
Sweet touches
- Chocolate candy corn, or Halloween cookies
Garnish
- Fresh herbs like rosemary or thyme
Optional decorations
- Witch hat cones made from chocolate-dipped waffle cones and cookie points
Instructions
- Pick a large wooden board, tray, or platter with enough space for all the ingredients. If you want a fuller look, start with a few small bowls for olives, nuts, or dips.
- Arrange the cheeses first, spacing them around the board so the display feels balanced. Slice some cheese ahead of time so guests can serve themselves easily.
- Fill in the open spaces with crackers, breadsticks, and fruit. Place the taller items near the center or edges to create a little height and visual interest.
- Set the witch hat cones on the board or tuck them into a corner for a playful Halloween look. If you are making them yourself, let the chocolate set fully before adding them.
- Add olives, nuts, candies, and herbs to fill in any gaps. The goal is to make the board look abundant while keeping the ingredients easy to reach.
Notes
Why You’ll Love This Halloween Cheese Board
This platter is easy to assemble, endlessly customizable, and perfect for grazing while everyone chats. It brings together sweet, salty, creamy, and crunchy bites in one beautiful spread.
You can make it as simple or as dramatic as you like, which makes it great for parties, family movie nights, or classroom celebrations. The witch hat look adds a festive touch without needing any complicated decorating skills.
Halloween Cheese Board Ingredients & Substitutions
- Assorted cheeses, such as cheddar, gouda, brie, or mozzarella
- Crackers, breadsticks, or sliced baguette
- Fresh fruit, such as grapes, strawberries, apple slices, or blackberries
- Olives for a savory bite
- Nuts, such as almonds or cashews
- Turkey pepperoni or turkey salami, if you want a savory addition
- Chocolate, candy corn, or Halloween cookies for a sweet touch
- Fresh herbs, like rosemary or thyme, for garnish
- Optional witch hat cones, made from chocolate-dipped waffle cones and cookie points
If you want to swap things around, use whatever cheeses you already love. You can also replace fresh fruit with dried fruit, or use seeded crackers instead of plain ones for extra texture.
Step-by-Step Instructions to Make Halloween Cheese Board
Step 1: Choose your board
Pick a large wooden board, tray, or platter with enough space for all the ingredients. If you want a fuller look, start with a few small bowls for olives, nuts, or dips.
Step 2: Place the cheeses
Arrange the cheeses first, spacing them around the board so the display feels balanced. Slice some cheese ahead of time so guests can serve themselves easily.
Step 3: Add the larger items
Fill in the open spaces with crackers, breadsticks, and fruit. Place the taller items near the center or edges to create a little height and visual interest.
Step 4: Build the witch hat details
Set the witch hat cones on the board or tuck them into a corner for a playful Halloween look. If you are making them yourself, let the chocolate set fully before adding them.
Step 5: Finish with smaller bites
Add olives, nuts, candies, and herbs to fill in any gaps. The goal is to make the board look abundant while keeping the ingredients easy to reach.
Tips for Success
Use a mix of colors and textures so the board looks inviting and balanced. A few soft cheeses, some sharp cheese, and a couple of crunchy or juicy items will make every bite more interesting.
Let cheeses sit out for a short time before serving so they taste their best. If you are serving outside, keep the board shaded and chilled until guests arrive.
Variations of Halloween Cheese Board
For a kid-friendly version, lean into fruit, mild cheese, crackers, and candy. You can also add mini pretzels, marshmallows, or chocolate-covered treats for more sweetness.
If you want a more savory board, add roasted vegetables, pickles, cured turkey meats, and a mustard or hummus dip. For a brunch-style board, pair cheese with apple slices, fig jam, and flaky pastries.
Serving Suggestions: What to Pair with Halloween Cheese Board
Serve this board with sparkling cider, grape juice spritzers, or a pot of hot apple cider. It also pairs well with soup, a simple salad, or a tray of warm bread.
For a party table, place the board beside other finger foods so guests can graze between sweet and savory bites. It works especially well as the centerpiece of a Halloween snack spread.
Storage & Reheating Instructions
Wrap leftover cheese tightly and store it in the refrigerator. Keep crackers, nuts, and candy in separate containers so they stay crisp and fresh.
There is no reheating needed, but let chilled cheese warm up slightly before serving again. Assemble only what you need if the party will last a while, then refill the board as needed.
Memories Made Around the Table
Some of the best party moments happen around a snack board like this one. People gather, pick their favorite bites, and linger just a little longer than planned, which is exactly what a festive table should do.
FAQs
How far in advance can I make this board?
You can prep most of the ingredients a few hours ahead, then assemble the board close to serving time. For the freshest look, add fruit and crackers at the end.
What cheeses work best for a Halloween cheese board?
Cheddar, brie, gouda, mozzarella, and pepper jack all work nicely. Choose a mix of mild and bold flavors so there is something for everyone.
How do I keep the board from looking empty?
Use small bowls, tuck in clusters of fruit, and fill gaps with nuts or herbs. A full-looking board is often just about layering and spacing.
Can I make this without candy?
Yes, and it will still feel festive. Use extra fruit, dark berries, dried apricots, or cookies shaped like ghosts and bats for a playful touch.
Final Thoughts
This Halloween cheese board is such an easy way to bring a little spooky fun to your table. With simple ingredients and a few creative touches, you can make a platter that feels festive, generous, and ready for sharing.