
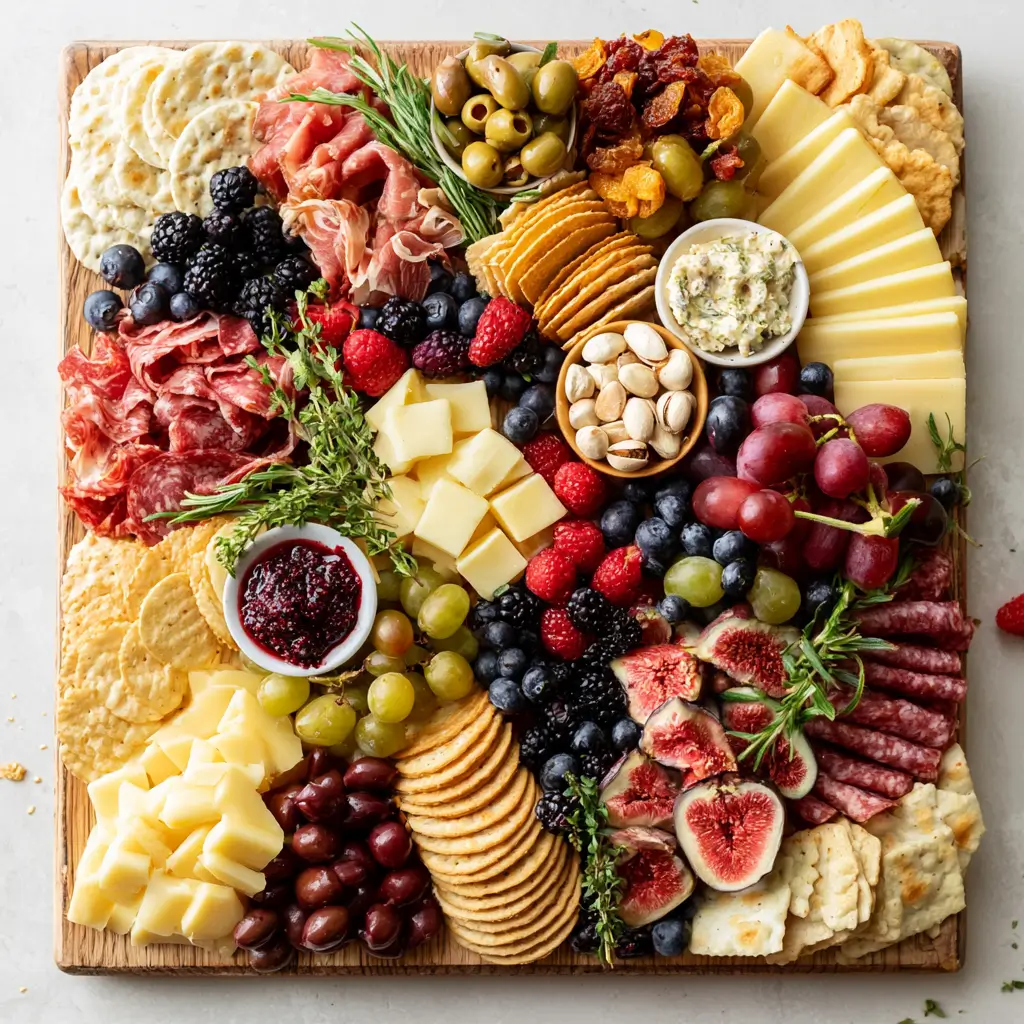
Building your first charcuterie board should feel fun, not stressful. This beginner-friendly guide keeps things simple with easy-to-find ingredients, a balanced mix of flavors, and a layout that looks beautiful on the table.
Beginner Charcuterie Board
Equipment
- 1 Large wooden board or platter or tray or baking sheet
- 1 Small bowls optional
- 1 Cheese knives optional
- 1 Napkins optional
- 1 Toothpicks optional
Ingredients
Cheese
- 3 cheeses of your choice such as cheddar, gouda, brie, or mozzarella balls
Crackers and bread
- 2 types of crackers or bread such as water crackers, crostini, sliced baguette, or breadsticks
Fruit
- 2 types of fruit such as grapes, strawberries, apple slices, figs, or berries
Crunchy snacks
- 1 to 2 crunchy snacks such as almonds, cashews, pretzels, or roasted chickpeas
Fresh bites
- 1 fresh vegetable such as cucumber slices, cherry tomatoes, or baby carrots
Sweet accents
- 1 to 2 sweet accents such as honey, jam, dried apricots, or chocolate pieces
Savory extras
- 1 to 2 savory extras such as olives, turkey salami, roasted peppers, or pickles
Instructions
- Pick a large wooden board, serving tray, or even a clean baking sheet. Anything flat and roomy will work well for a first-time setup.
- Set out the cheeses and any small bowls for honey, jam, or olives. Spreading these anchor items around the board helps create a balanced look.
- Arrange crackers, slices of bread, and clusters of fruit around the cheese. Try to separate similar colors so the board feels lively and full.
- Fill the open spaces with nuts, dried fruit, pickles, and fresh vegetables. These smaller items help the board look generous and finished.
- Add honey with a small spoon, fold any sliced turkey salami, and place herbs or extra berries where they brighten the board. Step back and adjust anything that looks crowded or uneven.
Notes
Why You’ll Love This Beginner Charcuterie Board
This board is all about ease and flexibility. You can mix sweet, savory, creamy, crunchy, and fresh bites without turning on the stove, which makes it perfect for a first party or a relaxed get-together.
It also looks impressive with very little effort. Once you know how to arrange a few key items, you can build a board that feels welcoming, colorful, and abundant.
Beginner Charcuterie Board Ingredients & Substitutions
Start with a few items from each category so the board feels balanced and inviting.
- Cheese: cheddar, gouda, brie, or mozzarella balls
- Crackers and bread: water crackers, crostini, sliced baguette, or breadsticks
- Fruit: grapes, strawberries, apple slices, figs, or berries
- Crunchy snacks: almonds, cashews, pretzels, or roasted chickpeas
- Fresh bites: cucumber slices, cherry tomatoes, or baby carrots
- Sweet accents: honey, jam, dried apricots, or chocolate pieces
- Savory extras: olives, turkey salami, roasted peppers, or pickles
If you cannot find a certain cheese or fruit, just swap in something similar in texture or flavor. The goal is variety, not perfection.
Step-by-Step Instructions to Make Beginner Charcuterie Board
Step 1, Choose your board or platter
Pick a large wooden board, serving tray, or even a clean baking sheet. Anything flat and roomy will work well for a first-time setup.
Step 2, Place the main items first
Set out the cheeses and any small bowls for honey, jam, or olives. Spreading these anchor items around the board helps create a balanced look.
Step 3, Add the larger fillers
Arrange crackers, slices of bread, and clusters of fruit around the cheese. Try to separate similar colors so the board feels lively and full.
Step 4, Tuck in the smaller snacks
Fill the open spaces with nuts, dried fruit, pickles, and fresh vegetables. These smaller items help the board look generous and finished.
Step 5, Finish with the pretty details
Add honey with a small spoon, fold any sliced turkey salami, and place herbs or extra berries where they brighten the board. Step back and adjust anything that looks crowded or uneven.
Tips for Success
Keep the variety simple, especially for your first board. Three cheeses, two fruits, two crackers, and a few extras are plenty.
Use different shapes and textures to make the board interesting. Round grapes, sliced cheese, long crackers, and small bowls all help create visual contrast.
Serve the board at room temperature for the best flavor. Pull the cheese out of the fridge about 20 to 30 minutes before guests arrive.
Variations of Beginner Charcuterie Board
You can easily change the theme based on the season or party style. For a breakfast-style board, add pastries, fruit, yogurt dip, and granola.
For a dessert board, use cookies, chocolate, strawberries, marshmallows, and sweet dips. You can also make a more savory version with cheese, olives, turkey salami, nuts, and roasted vegetables.
Serving Suggestions: What to Pair with Beginner Charcuterie Board
This board pairs nicely with sparkling water, fruit juice, lemonade, or iced tea. If you are serving it as part of a larger menu, add a simple salad, soup, or baked pasta so guests have a fuller meal option.
It also works well with a few small serving plates, cheese knives, napkins, and toothpicks so everyone can help themselves easily.
Storage & Reheating Instructions
Charcuterie boards are best assembled shortly before serving. If you need to prep ahead, wash and dry the fruit, portion the crackers, and cut the cheese up to one day in advance.
Store leftovers in separate airtight containers in the refrigerator. Crackers and bread should be kept apart from moist ingredients so they stay crisp.
Memories Made Around the Table
Some of the best party moments happen when people gather around a board and start chatting over small bites. A simple spread like this can turn an ordinary evening into something warm, relaxed, and memorable.
FAQs
How many items should be on a beginner charcuterie board?
Start with 5 to 7 items total, then build from there. A few cheeses, fruits, crackers, and extras are enough to make the board feel complete.
What cheeses work best for first-time hosts?
Choose cheeses that are easy to slice and familiar to most guests, such as cheddar, gouda, brie, or mozzarella balls.
Can I make this board ahead of time?
Yes, you can prep most ingredients a few hours in advance. For the freshest look, assemble the board just before guests arrive.
What if I do not have a wooden board?
A large platter, tray, or baking sheet works just fine. The presentation still looks beautiful when the ingredients are arranged with care.
Final Thoughts
Your first charcuterie board does not need to be complicated to feel special. With a few well-chosen ingredients and a relaxed approach, you can create a spread that is easy to make, lovely to serve, and fun to share.